
How to Seal Saltillo Tile: A Complete Step-by-Step Guide
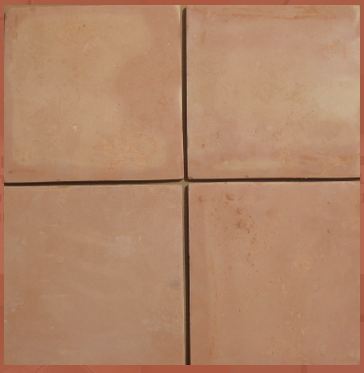
Saltillo tile is one of the most beautiful flooring options for Southwestern and Mediterranean-inspired homes. Its warm, earthy tones and handmade character add authenticity that factory tile cannot match. But that same natural, porous composition makes proper sealing essential — and the sequence matters more than most guides tell you.
Why Sealing Saltillo Tile Is Non-Negotiable
Saltillo tile is made from natural clay, hand-pressed in wooden molds, and fired in traditional kilns. The resulting surface is porous and absorbs liquids readily. Without sealing, water, grease, wine, and everyday spills soak in and stain permanently.
Proper sealing blocks stains from penetrating the clay, enhances the natural reds, oranges, and earth tones, and makes ongoing maintenance far easier. A well-sealed Saltillo floor develops a beautiful patina over time rather than just looking worn.
The Correct Sealing Sequence
This is the most important section in this guide. Many online sources say "seal before grouting." That's incomplete. Saltillo tile must be fully sealed — penetrating sealer and topcoat — before installation begins. Here's the correct sequence:
- Apply penetrating sealer or oil to raw tile. Use a pump spray bottle (a 1-gallon pesticide-style bottle with a spray wand works well) to apply even coats. A sponge or brush also works. Apply 1-2 coats, allowing 30-40 minutes of dry time between coats. The tile is saturated when the sealer begins to bead on top — wipe off any beading.
- Apply acrylic wax topcoat sealer. Once the penetrating sealer has dried, apply 1-2 coats of acrylic wax sealer depending on your desired finish level. Allow 30-45 minutes of dry time between coats. The tiles are now ready to install.
- Install with thinset. Apply thinset mortar and set the sealed tiles into place.
- Grout. Once thinset is dry, apply grout in 1-2 square foot areas at a time. Clean each section before moving to the next. This prevents grout from drying on the tile surface — Saltillo's porosity means grout sets faster than you expect.
- Apply a final coat of acrylic wax sealer. After the floor is grouted and cleaned, apply a finishing coat using a mop with a rayon mop head or a sponge. Each additional coat adds protection and increases shine. Allow 30-45 minutes of dry time between coats.
Understanding Your Sealer Options
Penetrating Sealers
Penetrating sealers soak into the tile body and provide protection from within. They don't change the tile's appearance or create a glossy surface — they're essentially invisible. This is always your first layer of protection on Saltillo tile.
Acrylic Wax Topcoat Sealers
After the penetrating sealer dries, you apply a topcoat. At Place of Clay, we use water-based acrylic wax sealers from Johnson Diversey in three finish levels:
- Plaza — high gloss finish. Produces the most shine and a rich, deep appearance.
- Fortify — medium gloss finish. Designed for high-traffic areas where you want protection with moderate sheen.
- Low Matte — a subtler finish for those who prefer less shine while maintaining surface protection.
All three are water-based, easy to apply, and build protection with each coat. More coats mean more shine and more protection. We stock these sealers in our Phoenix showroom.
Three Finish Methods
Which method you choose depends on the look you want. All three follow the same installation sequence above — the difference is in the penetrating sealer step.
Method 1: Clear Finish
The most common approach. A standard penetrating sealer goes on first, followed by your choice of acrylic wax topcoat (Plaza, Fortify, or Low Matte). This protects the tile while keeping the natural Saltillo color intact, with the topcoat adding warmth and depth to the earth tones.
Method 2: Oil Finish
This is the traditional method that gives Saltillo floors their classic, rich warmth. If you've admired the deep, honeyed look of Saltillo in older Southwestern homes, it was likely finished with oil.
Mix a 50/50 blend of Boiled Linseed Oil and Paint Thinner. The linseed oil penetrates deep into the clay body, enriching the color and evening out tonal variation. The paint thinner helps it absorb rather than sit on the surface. This method is particularly effective at hiding minor blemishes and surface imperfections.
Safety note: Boiled Linseed Oil and Paint Thinner are flammable. Use in a well-ventilated area, keep away from heat sources, and properly dispose of any rags — oil-soaked rags can spontaneously combust.
After the oil finish dries, apply your acrylic wax topcoat as described above.
Method 3: Stained Saltillo
For homeowners who want to add color beyond Saltillo's natural palette, the stained method combines oil and water-based concrete stain.
- Apply the oil method (50/50 Boiled Linseed Oil and Paint Thinner).
- Apply water-based concrete stain for your chosen color. The stain builds on the oil base, creating layered color that looks organic rather than painted.
- Apply acrylic wax topcoat. In some cases, stain can be added directly to the topcoat for deeper color saturation.
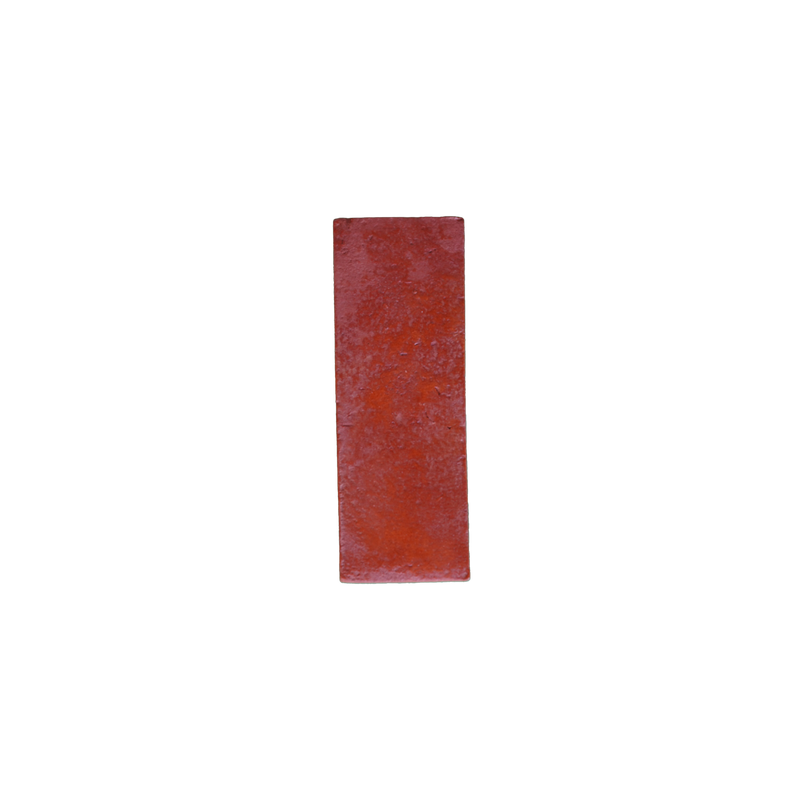
Heritage tile in Adobe — proper sealing before installation protects the clay and develops this warm finish.
Critical Mistakes to Avoid
Grouting before sealing. The single most common and most damaging mistake. Saltillo tile must be sealed before thinset and grout. Grout pressed into unsealed, porous clay creates permanent discoloration that no cleaning will remove.
Sealing only before grout, not before thinset. Many guides miss this. Saltillo is so porous that it absorbs moisture from thinset as well as grout. The tile needs its penetrating sealer and topcoat applied before any wet materials touch it.
Using vinegar or acidic cleaners. Vinegar and other acidic cleaners eat into both the sealer and the clay body. Use only pH-neutral cleaners formulated for natural stone and tile.
Applying sealer to damp tile. Moisture prevents penetration and causes cloudiness. In humid climates, give tile extra drying time.
Using big-box store sealers. Generic "tile sealers" are formulated for factory porcelain and ceramic, not handmade Mexican tile. The chemistry is different.
Substituting grout release for sealer. Grout release is a temporary installation aid, not a sealer. It does not provide the same protection as a penetrating sealer.
How Often Should You Reseal?
Resealing frequency depends on traffic:
- Light-traffic areas (guest rooms, formal spaces): Every 3-5 years
- Moderate-traffic areas (living rooms, bedrooms): Every 2-3 years
- High-traffic areas (kitchens, entryways): Every 1-2 years
To test your sealer's condition, sprinkle a few drops of water on the tile. If the water beads up and sits on the surface, the sealer is still working. If it absorbs or darkens the tile, it's time to reseal.
Place of Clay's Sealing Service
We offer sealing as a service for the Phoenix area. We use the same products and methods described in this guide, applied by people who work with Saltillo tile every day.
Whether you're sealing yourself or working with us, the most important thing is using the right products in the right sequence. A properly sealed Saltillo floor will reward you with decades of beauty that improves with age.
Browse our complete Saltillo tile collection, or visit our showroom to see sealed samples in every finish. We carry sealers, can recommend local installers, and offer sealing service.
Place of Clay
1830 E Washington Street, Phoenix, AZ
Phone: (602) 252-1506
Email: info@placeofclay.com