
How to Clean and Maintain Saltillo Tile Floors

Saltillo tile brings timeless beauty and warmth to any home, but maintaining it properly is key to preserving its appearance and protecting your investment. Unlike modern flooring materials, Saltillo's handmade nature means it requires thoughtful cleaning practices and regular maintenance—and that's part of its charm. As Homes and Gardens style editor Charlotte Olby writes, terracotta is "experiencing a resurgence" because its "warmth and rustic charm create an inviting atmosphere." The natural patina that develops over time makes Saltillo more beautiful with age, not less.
The good news? Caring for Saltillo tile is straightforward once you know what works—and crucially, what to avoid. In this guide, we'll walk you through daily cleaning routines, deep cleaning techniques, stain removal strategies, and the one question we hear most from Phoenix-area customers: why vinegar doesn't work. We'll also explain why sealing your Saltillo makes maintenance easier and why so many homeowners choose to have us handle it professionally.
Daily and Weekly Maintenance
The foundation of Saltillo tile care is simple, consistent maintenance. Most damage and discoloration happens because spills sit too long or dirt accumulates on the surface.
Daily Sweeping
Sweep your Saltillo tile floors daily using a soft-bristled broom or dry microfiber dust mop. Avoid vacuums with hard plastic wheels, which can scratch the tile's surface. Daily sweeping removes sand, grit, and dust that can be tracked around the house and ground into the tile—this is one of the best preventative measures you can take.
Quick Spot Cleaning
Wipe up spills immediately with a soft, damp cloth. This is crucial because Saltillo's porous nature means liquids will penetrate quickly if left standing. Water, wine, oil, juice—any spill should be addressed within minutes, not hours.
Weekly Damp Mopping
Once or twice weekly, do a damp mop with minimal water. Use a microfiber mop or soft cloth wrung out well—you want it barely damp, not wet. Excess water can seep into grout lines and the porous tile, potentially causing damage over time. Move the mop in overlapping motions to ensure even coverage.
Choosing the Right Cleaners
One of the most common mistakes in Saltillo tile care is using the wrong cleaning products. The key principle is this: use only pH-neutral cleaners specifically formulated for natural stone and tile.
What to Use
- pH-Neutral Tile Cleaners: These are specifically designed for natural tile and won't damage the surface or sealer. Look for products labeled "pH-neutral" or "safe for natural stone."
- Mild Dish Soap Solution: In a pinch, you can mix a small amount of mild, non-acidic dish soap with water (1 teaspoon per gallon). This works for routine cleaning but shouldn't be your go-to long-term solution.
- Castile Soap: A natural, plant-based cleaner that's gentle on tile and good for the environment.
What to Avoid
- Vinegar and Acidic Cleaners (The #1 Question): This is the most common question we hear at Place of Clay: "Can I use vinegar on Saltillo?" The answer is always no. Despite their popularity and affordability, vinegar, lemon juice, and other acidic solutions are corrosive to terracotta. They will etch the tile's surface, degrade the sealer, and cause permanent damage. Many customers discover this too late. Stick to pH-neutral products.
- Abrasive Scrubbers: Steel wool, scouring pads, and hard-bristled brushes will scratch the tile's surface. Always use soft brushes or cloths.
- Oil-Based Products: Products designed to create shine often contain oils that leave residue and attract dirt, making floors look dull faster.
- Multi-Purpose Cleaners: Most commercial all-purpose cleaners contain ingredients that can dull the finish or damage the sealer over time.
Deep Cleaning Process
Every month or two, depending on traffic, perform a more thorough deep clean to remove accumulated grime and refresh the tile.
Supplies You'll Need
- Soft-bristled brush or microfiber mop
- pH-neutral tile cleaner
- Two buckets (one for cleaning solution, one for rinsing)
- Clean, soft cloths or mops
- Distilled water (preferred over tap water, which can leave mineral deposits)
The Process
Step 1: Vacuum or Sweep Thoroughly Remove all loose dirt, dust, and debris. Don't skip this step—it prevents you from spreading grit across the tile during wet cleaning.
Step 2: Mix Your Cleaning Solution Follow the tile cleaner's instructions carefully. Too much cleaner doesn't clean better; it leaves residue and buildup.
Step 3: Apply the Solution Using a soft brush or damp mop, apply the cleaning solution to small sections at a time. Work the solution into the tile and grout lines gently. Don't let the solution sit for more than a few minutes.
Step 4: Rinse Thoroughly Using clean water and a separate mop or cloth, rinse each section completely. This step is essential—any leftover cleaner residue will create a dull, sticky appearance. You may need to rinse multiple times.
Step 5: Dry the Floor Use clean, soft cloths to dry the floor completely. This prevents water spots and mineral deposits. Open windows or use fans to aid air circulation.
For a visual walkthrough of deep cleaning grout lines on tile floors, this video from This Old House demonstrates effective techniques:
Handling Specific Stains
Even sealed Saltillo tile can sometimes get stained, especially in high-traffic areas or if spills aren't addressed immediately. Here's how to handle common stains:
Grease and Oil Stains
For fresh stains, blot with a clean, dry cloth immediately. For set-in grease stains, make a poultice using baking soda and a small amount of water to form a paste. Apply it to the stain, cover with plastic wrap, and let it sit overnight. The baking soda will draw out the grease. Wipe clean and rinse thoroughly. Avoid oil-based cleaners, which can make the stain worse.
Wine, Juice, and Food Spills
Clean fresh spills immediately with a damp cloth and your pH-neutral cleaner. For older stains, try a poultice made from baking soda and hydrogen peroxide (not chlorine bleach). Apply, cover, and let sit for 24 hours, then rinse thoroughly.
Rust or Iron Stains
These can appear from metal outdoor furniture or tools left on the tile. Use a commercial rust remover designed for natural stone, following instructions carefully. Test on an inconspicuous area first.
Mildew or Mold
In humid areas, light mildew may appear in grout lines. Clean with a soft brush and your pH-neutral cleaner. For persistent mold, use a dilute hydrogen peroxide solution (not bleach). Ensure the area dries completely afterward and improve ventilation to prevent recurrence.
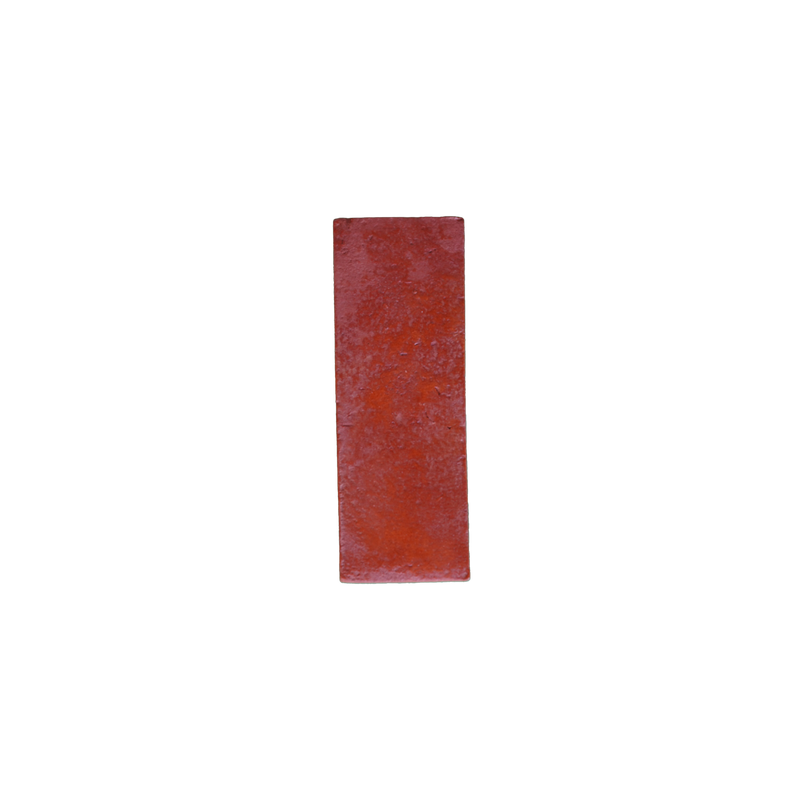
Properly sealed terracotta — like this Heritage tile in Adobe — resists staining and simplifies daily maintenance.
Sealed vs. Unsealed: Why Sealing Changes Everything
One of the biggest misconceptions about Saltillo is that sealing is optional. While unsealed Saltillo is beautiful, sealed Saltillo is dramatically easier to maintain. Here's why it matters:
Unsealed Saltillo: Porous, absorbs spills quickly, stains more easily, requires more frequent cleaning, no protective barrier against damage.
Sealed Saltillo (with acrylic wax topcoat): Water and most spills bead up on the surface, giving you time to wipe them before penetration. Sealed surfaces resist staining longer, cleaning becomes faster and less labor-intensive, and the sealer builds a protective layer that develops character over time.
We carry three acrylic wax topcoat finishes from Johnson Diversey: Plaza (high gloss), Fortify (medium gloss, ideal for high-traffic areas), and Low Matte (subtle sheen). All are water-based and paired with a penetrating sealer as the base layer. We also offer sealing service in the Phoenix area.
Signs Your Sealer Needs Refreshing
Regular maintenance isn't limited to cleaning—you also need to monitor your sealer's effectiveness. Watch for these signs:
- Water no longer beads up: Perform the water bead test monthly. If water absorbs into the tile instead of sitting on the surface, your sealer is wearing thin.
- Darker spots that don't rinse clean: These indicate water penetrating the tile, a sign the sealer is failing.
- Dull or hazy appearance: This can indicate sealer degradation or heavy residue buildup from improper cleaners.
- Grout discoloration: Grout that looks darker or stained suggests water absorption, meaning the sealer needs refreshing.
- More frequent staining: If you notice stains appearing more easily than before, it's likely time to reseal.
When you notice these signs, refer to our complete sealing guide for restoration options—or contact us directly for our professional sealing service in the Phoenix area.
Seasonal Maintenance Tips
Spring Cleaning
After winter, do a thorough deep clean to remove salt residue from shoes (if you're in a snowy climate), dust buildup, and any tracked-in grime. Spring is also a good time to assess whether your sealer needs refreshing before the busier months ahead.
Summer
High traffic during warmer months means more dirt and dust. Increase sweeping frequency, and watch for signs of sealer wear. The heat can accelerate sealer breakdown, especially in direct sunlight.
Fall
Similar to spring, fall is a good reset time. Remove any debris from leaves, pollen, or outdoor dirt. Check your sealer's condition and consider resealing high-traffic areas if needed.
Winter
If you live in a cold climate, pay special attention to salt and moisture brought in on shoes and boots. Wipe feet or use door mats to minimize salt exposure. Ensure moisture dries quickly to prevent water damage.
Protecting High-Traffic Areas
Kitchens, entryways, and bathrooms receive the most wear. Consider these strategies:
- Use area rugs: Place washable rugs in high-traffic zones to reduce direct wear on the tile. This is especially helpful near kitchen islands or entryways.
- Reseal more frequently: High-traffic areas should be resealed every 1-2 years instead of waiting 3-5 years.
- Clean spills faster: In kitchens especially, grease and liquid spills happen regularly. Wipe them immediately to prevent staining.
- Use protective mats: Under sinks and in front of stoves, mats reduce water and oil splashing onto the tile.
Professional Cleaning and Sealing Services
While Saltillo tile is manageable for DIY cleaning, annual professional cleaning can help maintain its beauty and assess sealer condition. Professional cleaners have access to specialized equipment and products that can remove deep-set grime and restore shine without damaging the tile. At Place of Clay, we go a step further—we offer full sealing services in the Phoenix area, not just cleaning. This means you get professional-grade protection with Plaza or Fortify sealer applied by people who know Saltillo inside and out. Many of our customers find this investment pays for itself in reduced maintenance and longer-lasting beauty.
Conclusion
Saltillo tile is remarkably durable when cared for properly. The key to long-lasting beauty is consistent, gentle maintenance: sweep daily, mop with pH-neutral cleaners, address spills immediately, and monitor your sealer's effectiveness. With these practices, your Saltillo tile will maintain its warmth and character for decades.
Have questions about caring for your Saltillo floors? Visit our Saltillo tile collection or contact Place of Clay directly. We're here to help you keep your floors looking beautiful.
Place of Clay
1830 E Washington Street, Phoenix, AZ
Phone: (602) 252-1506
Email: info@placeofclay.com